Need Drywall Repair in Vancouver to Abbotsford – Click Here >
Textured ceilings, commonly known as popcorn or stucco ceilings, have played a significant role in the design of residential spaces, especially during the mid-20th century. Their popularity was primarily due to their ability to hide imperfections and absorb sound. However, with changing trends and a growing emphasis on modern, clean lines, many homeowners in Vancouver BC are now seeking ways to repair, update, or entirely remove textured ceilings. This comprehensive guide addresses a wide range of questions, from basic repairs to complete transformations.
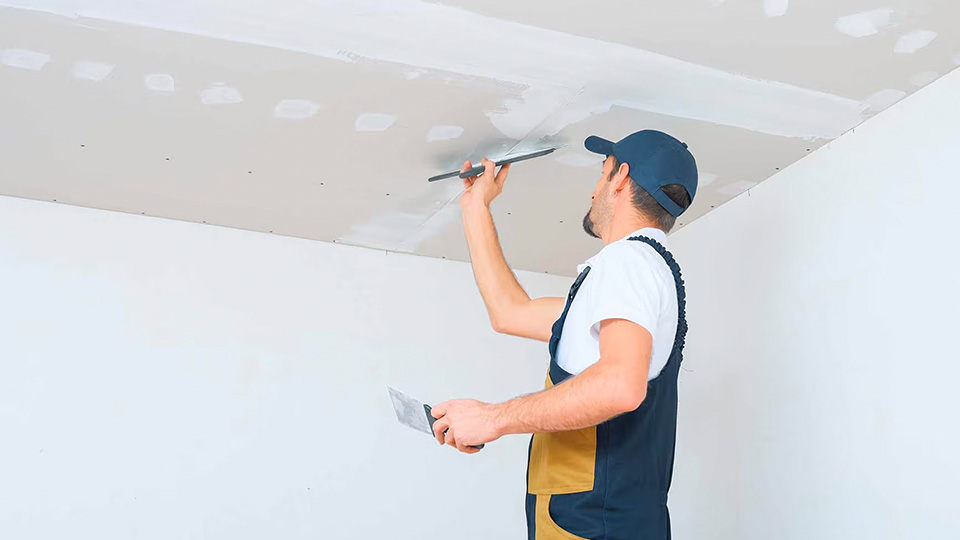
### Can a Textured Ceiling be Patched?
Textured ceilings can be patched, but the process requires careful handling to maintain consistency in texture and appearance. Start by identifying the type of texture on your ceiling; common types include popcorn, knockdown, orange peel, and stipple. Once you understand the texture, you can proceed with the patching process:
1. **Prepare the Surface**: Remove any loose or damaged material from the ceiling. Clean the area to remove dust and debris.
2. **Apply Drywall Compound**: Use a lightweight drywall compound to fill the damaged area. For smaller patches, you can use a textured ceiling patch kit designed for this purpose.
3. **Blend the Texture**: Depending on the existing texture, you might need a sponge, brush, or spray texture applicator to blend the new patch with the surrounding ceiling.
4. **Allow to Dry and Paint**: Once the patch is dry, paint over it to match the rest of the ceiling.
### What is the Best Compound for Ceiling Repair?
The best compound for ceiling repair is typically a lightweight drywall compound or joint compound. These compounds are easy to work with, allowing you to sand, smooth, or texture them as needed. Pre-mixed options are available, which can simplify the repair process for DIY enthusiasts.
### How Do You Modernize a Textured Ceiling?
Modernizing a textured ceiling can be achieved through several approaches, depending on your budget, time, and desired outcome. Here are some popular methods:
– **Smooth the Ceiling**: This involves scraping off the texture and applying a smooth coat of drywall compound. It’s labor-intensive and creates a significant amount of dust, but the result is a sleek, modern look.
– **Cover with Panels or Planks**: Installing ceiling panels, wood planks, or shiplap over the textured ceiling provides a modern appearance without extensive removal work. This approach can also add a unique design element to the room.
– **Add Decorative Elements**: Crown molding, faux beams, or other decorative elements can draw attention away from the textured ceiling, giving the space a more contemporary feel.
### What Can I Use to Retexture My Ceiling?
Retexturing a ceiling offers an opportunity to refresh the look of a room without complete removal. To retexture, you can use various tools and materials, such as:
– **Spray Texture**: Ideal for creating a consistent texture over large areas. You can use a spray texture canister or a texture hopper gun for larger projects.
– **Stipple Brushes**: Useful for creating patterns or designs on the ceiling. Stippling is a popular technique that creates a bumpy, textured surface.
– **Drywall Mud with Trowels or Knives**: This allows for a variety of textures, from smooth to heavily textured. You can experiment with different tools to create unique patterns.
### How Can I Cover a Textured Ceiling Without Removing It?
If you prefer not to remove the textured ceiling, there are several methods to cover it without extensive demolition:
– **Ceiling Tiles or Panels**: These can be installed directly over the existing ceiling, providing a clean, finished look. Acoustic tiles are also available, offering sound absorption benefits.
– **Wood Planks or Shiplap**: This approach adds warmth and texture to the room. Depending on the style, it can create a rustic or modern appearance.
– **Fabric or Wallpaper**: Using fabric or wallpaper to cover a textured ceiling is a creative way to hide the texture and add a unique aesthetic. This method is especially useful for smaller spaces like bedrooms or home offices.
### Can You Sand Down a Textured Ceiling?
Sanding down a textured ceiling is possible but requires significant effort and safety precautions. Before sanding, ensure that the ceiling does not contain asbestos, a common concern with older popcorn ceilings. Here’s a step-by-step process for sanding down a textured ceiling:
1. **Prepare the Area**: Cover furniture and floors with plastic sheeting to protect from dust and debris.
2. **Use Protective Gear**: Wear a mask, goggles, and protective clothing to shield yourself from dust.
3. **Begin Sanding**: Use 120-grit sandpaper to start. Depending on the level of texture, you may need to use coarser grit to remove the bulk of the texture before smoothing it with finer grit.
4. **Clean Up**: After sanding, vacuum and clean the area to remove all dust. Consider using a shop vac with a HEPA filter for better dust control.
### What Ceiling Texture is Most Popular?
While popcorn ceilings were once popular, modern trends favor smoother and more subtle textures. Some of the most popular ceiling textures today include:
– **Knockdown**: This texture involves spraying a layer of texture and then flattening it slightly to create a “knocked-down” appearance.
– **Orange Peel**: A subtle texture that resembles the skin of an orange. It’s achieved by spraying texture and allowing it to dry without flattening.
– **Smooth**: A classic, flat finish that works well in modern interiors.
### How Do You Strip a Textured Ceiling?
Stripping a textured ceiling can be a challenging task, especially if asbestos is present. Here’s a general process for stripping a textured ceiling:
1. **Test for Asbestos**: If the ceiling was installed before the 1980s, have it tested for asbestos. If asbestos is present, hire professionals for removal.
2. **Prepare the Area**: Cover furniture and floors with plastic sheeting to protect from debris.
3. **Wet the Surface**: Wetting the texture helps soften it, making it easier to scrape off.
4. **Scrape the Ceiling**: Use a scraper or putty knife to remove the texture. Be prepared for a messy process.
5. **Smooth the Surface**: After scraping, apply a layer of drywall compound to smooth out any imperfections.
6. **Sand and Paint**: Once the compound is dry, sand it to achieve a smooth finish, then paint to complete the process.
### What is the Best Alternative to Popcorn Ceilings?
If you’re looking for alternatives to popcorn ceilings, consider these options:
– **Smooth Ceilings**: A sleek, modern option that fits well with contemporary designs.
– **Coffered or Beamed Ceilings**: These add depth and visual interest to a room, giving it a more luxurious feel.
– **Textured Panels**: Provide texture without the disadvantages of popcorn ceilings, offering a wide range of styles and designs.
### How Do You Cover Imperfections on a Ceiling?
To cover imperfections on a ceiling, consider these approaches:
– **Ceiling Tiles or Panels**: These hide imperfections while adding style and character to the room.
– **Textured Paint**: Can cover minor imperfections and add visual interest. This is a simple solution for DIY projects.
– **Drywall Compound**: Use to fill in cracks or uneven spots before painting. This method is effective for addressing more significant imperfections.
### What Compound Do You Use to Texture a Ceiling?
To texture a ceiling, you can use various compounds, such as:
– **Drywall Compound**: This is the most common choice for texturing. It can be applied with trowels, knives, or spray applicators to create a variety of textures.
– **Joint Compound**: Similar to drywall compound, joint compound is versatile and can be used to create a wide range of textures.
– **Specialty Ceiling Texture Products**: These are designed specifically for creating textures and may offer unique effects not achievable with standard compounds.
### How Much Does It Cost to Smooth Out Textured Ceilings?
The cost of smoothing out textured ceilings varies based on several factors:
– **Size of the Area**: Larger areas will require more time and materials, increasing the cost.
– **Type of Texture**: Heavily textured ceilings may require more effort to smooth.
– **Asbestos Removal**: If asbestos is present, the cost will be higher due to specialized removal techniques and safety measures.
On average, you can expect to pay between $1,500 and $3,500 for smoothing out a typical room. If asbestos removal is required, costs can rise significantly, with prices ranging from $3,000 to $10,000 depending on the complexity and safety requirements.
### Final Thoughts
Textured ceilings can be patched, updated, or removed, depending on your preference and budget. Whether you’re looking to repair a small area or undertake a complete transformation, Vancouver BC residents have a range of options. Always prioritize safety, especially when dealing with older textured ceilings that might contain asbestos. If in doubt, consult professionals to ensure the best results and a safe environment.